Note: This is from my aviation knowledge only and I am not a pilot myself. Countless YouTube videos do not make me professional.I am not liable for what happens when you perform such a scenario in a real-life case.
If at any point in life you find yourself in such a situation, you will be ready to take the controls. Here are the instructions to land B737 MAX alone and manually in 17 steps!
1.1 Co-Pilot Seating
This manual is written from a co-pilot’s seat perspective, so, for the best experience, sit on the right side.
1.2 Instrumentation
Familiarise yourself with the instruments required for landing:
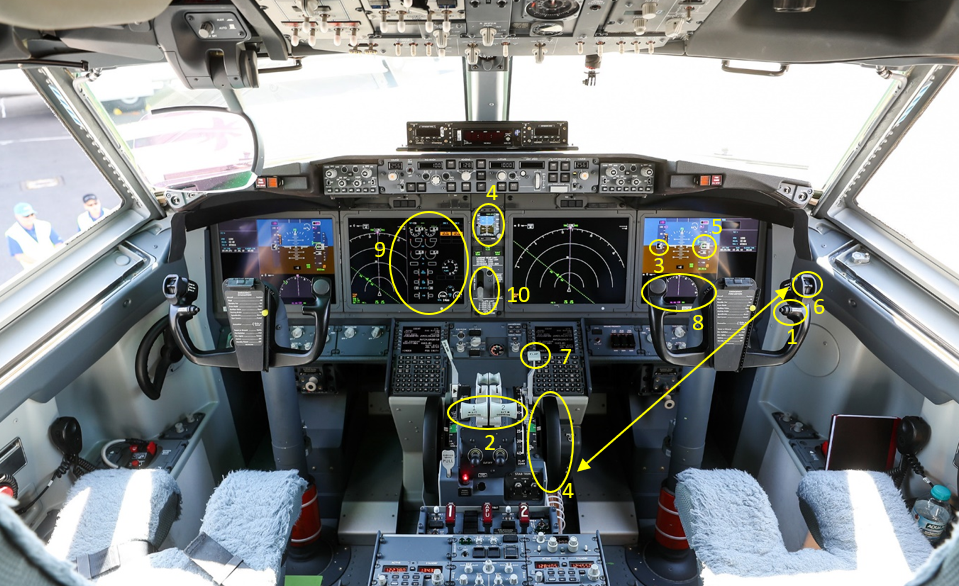
On the right side, next to the steering yoke (the aircraft’s steering wheel), a button by your thumb ‘Autopilot Disengage’(img 1.1), press it, the siren goes on, then press it again to get rid of the siren.
Put your hand on both ‘Thrust Levers’(img 1.2), there is a button on your right thumb ‘Autothrottle Disconnect’, press it. The plane is now fully in manual control.
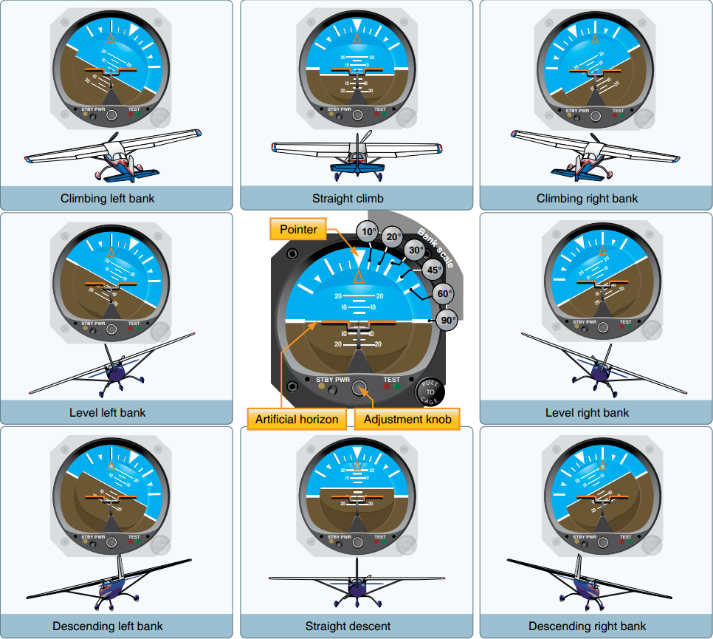
Look at your ‘Primary Flight Display’, speed is 414 kph1 (img 1.3). Bring back the thrust levers and just feel what happens to the aircraft, it is trying to pitch forward by itself. Pitch the steering yoke, but not too much, just a couple of degrees (img 2). Look at the ‘Attitude Indicator’(img 1.4), that you have in front of you. Bring the aircraft down a couple of degrees, do not let the speed decrease too much, keep it steady.
1.3 Flying and descent
Continue the descent, keep the speed around 410 kph. Look at the ‘Altitude Band’(img 1.5), descent to 3000ft and level off. If you want to increase the speed, push forward the steering yoke, if you want to decrease the speed, pull the steering yoke up.
On your right hand thumb there is a ‘Trim Switch’(img 1.6). If you are using a lot of force to fly the aircraft, then move the trim switch either forward or backward to get rid of the force.
When you are turning right or left watch how many degrees the turn is on the primary flight display (img 2).
Note: This is just the preparation for the landing later. Add a little bit of thrust to see how the aircraft feels, it should push the nose upwards. Set ‘Flaps’(img 1.7) to 1. Speed should drop, so you have to add thrust and set the speed to about 350 kph. The aircraft pitches the nose upwards, counteract this by pitching forward (use step 5 if needed). Take the thrust off and continue the descent to 3000 ft.
Follow the required heading which can be found by looking straight below the primary flight display (img 1.8).
Bring the speed back to 350 kph when you reach 3000 ft. Do not let it drop below 350 kph, otherwise the aircraft will stall!
1.4 Stabilising before the approach
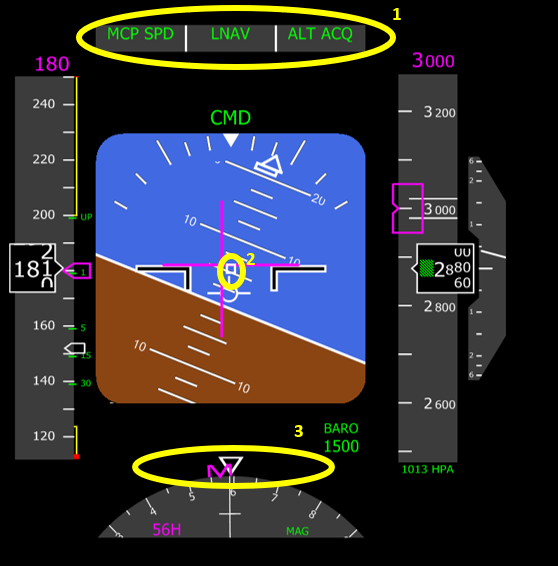
Check if your VOR lock and glide slope are in green on your FMA, that means you are on glidepath (img 3.1)(learn more about Visual Glide Slope Indicators).
Look at the Flight Director (img 3),the tiny white square in the centre (img 3.2) is your position and two horizontal and vertical pink lines are guidelines of the flight director. When you turn either way you will see how these two lines move. Your one and only job is to ‘chase’ the cross point of these two pink lines (learn more about Flight Director). Do not descend yet. Stabilise yourself on the localizer (img 3.3) first and follow the heading.
When the glide slope is in a centre, bring thrust levers to about 50%. Look on the ‘Engine Instrumentation’(img 1.9) screen. On the very top of that there is an ‘N1 Indicator’, putting the thrust to about 53%.
1.5 Visual contact and landing
- The visual contact to the runway now should be established.
- Start to pitch down to about 800 ft per minute. Put the gear down (img 1.10), set flaps 15.
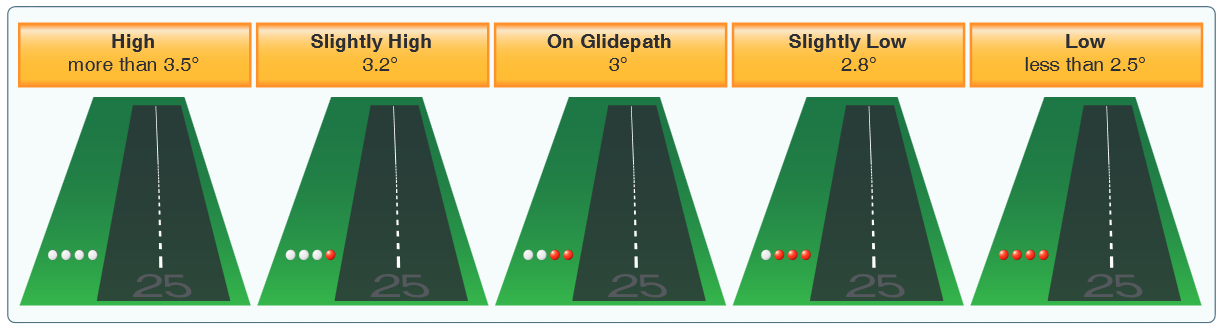
- The runway lights should be 2 white and 2 red (img 4). Pitch down and take the thrust off idle. Bring the flaps back to 30. Keep the thrust at idle. Descent till you see one red light, then pitch up.
- Bring the thrust up to about midway. If you don’t do that then when you take flaps 40 and there isn’t any thrust the plane is going to stall.
- Aim at the beginning of a runway. When you get over the runway close the thrust levers and keep the altitude – let it sink down the runway itself.
- Once you land, use those breaks at the top of your feet. 500 ft height should meet the speed around 225 kph.
Sources
- https://www.faa.gov/air_traffic/publications/atpubs/aim_html/chap2_section_1.html
- https://www.bloomberg.com/news/articles/2020-02-21/boeing-failure-to-fix-737-max-cockpit-light-may-draw-faa-penalty?leadSource=uverify%20wall
- https://mediawiki.ivao.aero/index.php?title=Perform_an_ILS_approach_%28B737%29
- https://www.cfinotebook.net/notebook/aircraft-operations/terminal/visual-glide-slope-indicators
- https://www.youtube.com/watch?v=YaOvtL6qYpc&t=576s
- https://aviation.stackexchange.com/questions/2702/what-is-a-flight-director
- https://www.youtube.com/watch?v=BWdcc-h-CZ4&ab_channel=hassanalmaei
Speed is taken as an example only, it varies with different situation/setting. ↩︎